OK, a quick tour-kind-of-thing regarding battery replacement in the Simmons SDS-7...
Read it in full before dismantling. This to decide if you think someone else better do it and also to decide which tools and extras you might need.
First of all. Most vintage gear seem to have their memory battery placed in a crappy location. Polysix, Opera 6, OSCar, Chroma etc. The SDS-7 is somewhat better off, but not too good. Here's a few shots I took while changing the batteries on Alternative Radio's/Ultravox's old SDS-7:
Unplug the unit. Remove the eight screws on the front panel. Be careful with the right panel, there's plenty of wires attached that you don't want to damage.
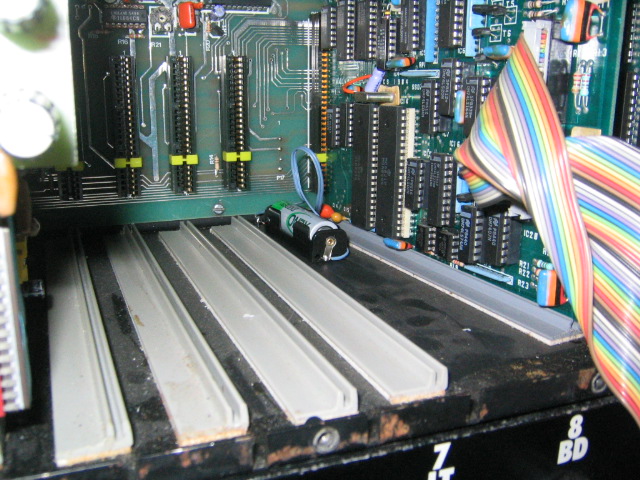
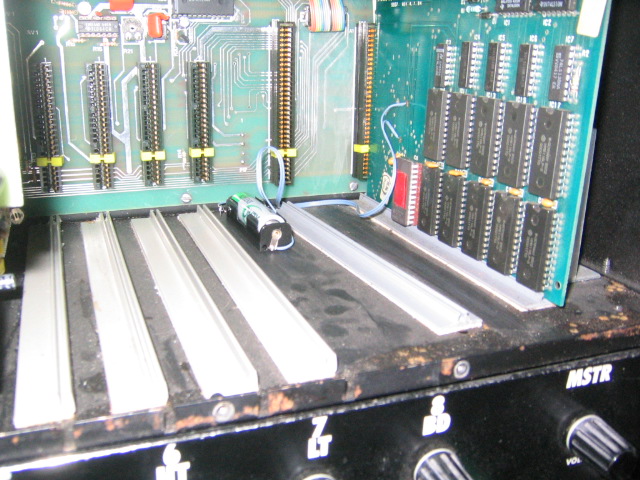
If your SDS-7 is fully loaded it might be wise to remove one or two of the rightmost cards to gain better access to the rest. Mind the plastic guides (yellow in the picture below) so the don't get lost.
Now, gently (gently!) pull out the leftmost of the cards behind the right panel (did that make any sense?). I wish I had taken photos from the start. Well, it looks like this (if you ignore the battery at the bottom):
As you might notice if you have Sherlock skills... my SDS-7 is still screwed to the rack. That's probably theeee best feature servicewise when it comes to the SDS-7.
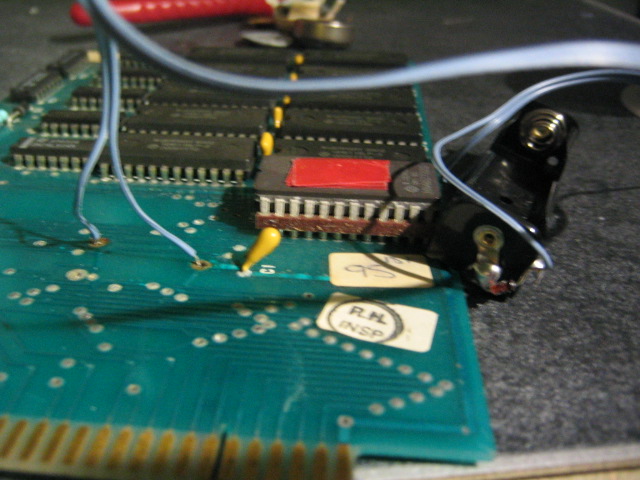
Anyway, with that card removed you find the battery card. Pull that too (now you're getting skilled at this!). This is the scary view that I met:
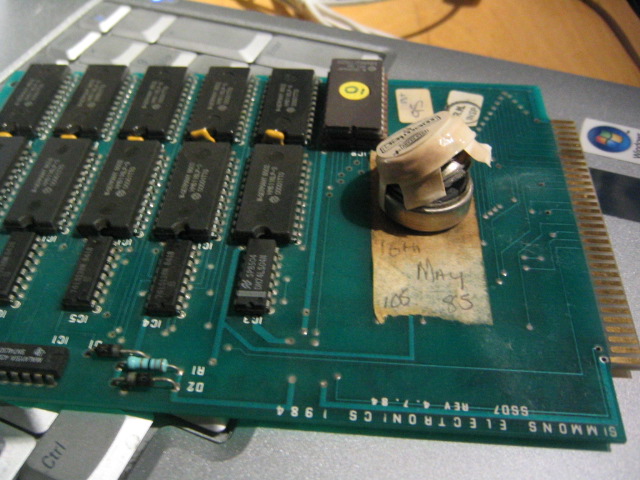
It's just divine intervention or pure luck that let me save anything at all! 16th of May 1985 is quite some time ago. The picture above was taken of the 4th of January 2012. :)
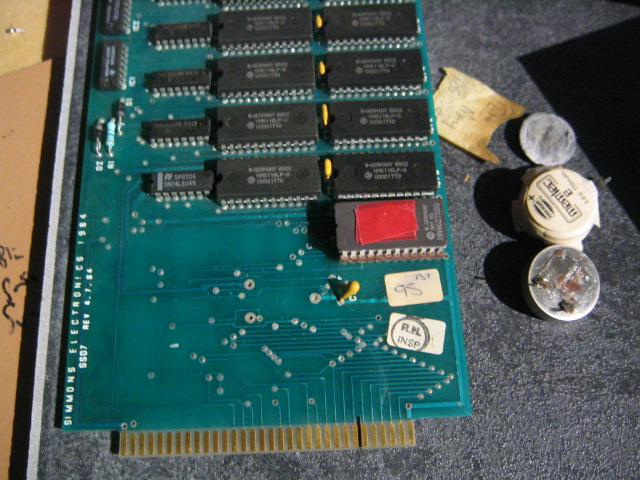
Desolder the battery and dump it in your closest recycling bin for such nasty thingies... Clean the board with alcohol and a cloth (that's what I prefer at least). Avoid static electricity and touching the IC's if you can avoid it.
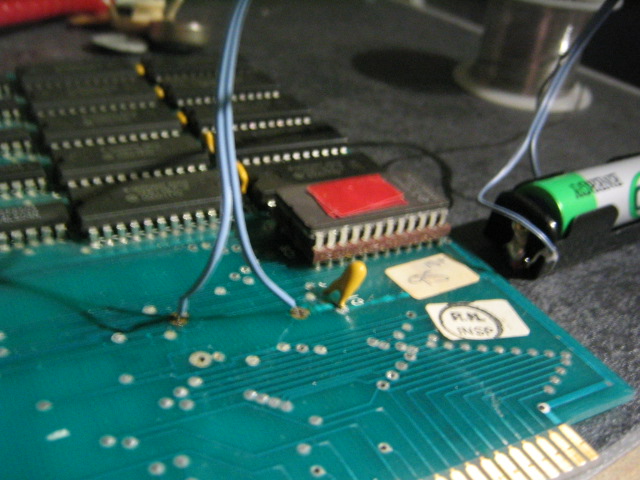
Afterwards it should look something like this (notice how the battery fell to pieces upon removal) and feel free to cover the eprom window on the closest IC if that wasn't done (it wasn't on mine (see the red in the picture)).
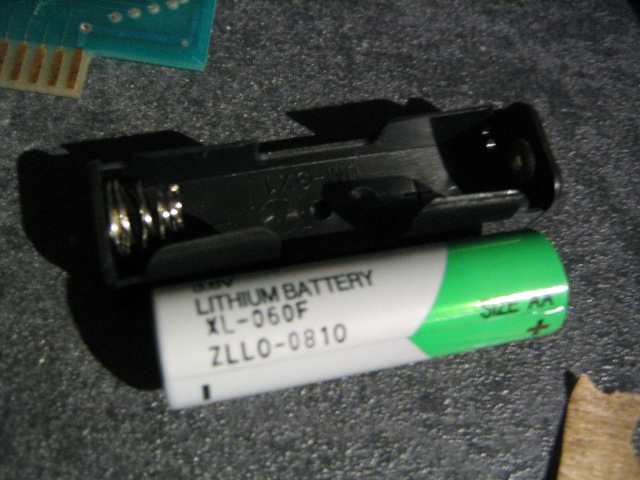
There's some debate wether you should use re-chargable batteries or long-life. I went for a Lithium long-life, AA size. I paired it up with a standard battery holder.
I'm in Sweden so I went to my local Kjell & Company-store. These batteries are not rare. So you should find them in all decent shops that sell electronic stuff... Do not use standard batteries since they don't last the 10-20 years the long-life does.
Off-focus, but who can blame an old Canon Ixus II? It's a miracle it still works. :)
Cut two wires (red+black is good, lazy guys like me use what they have lying around). 20-30 centimeters is good too. (Metric dudes and dudettes... that's about 8-12 inches.) Triple-check and then solder positive to positive and negative to negative. As I recall it, the card is marked. If not, double check on the removed battery.
Another view of the result:
Back into the studio I replaced the battery card. I allowed the wires to slide behind and below the rails for the next card (the first we removed). I also added a large chunk of double-sided tape to the battery holder. Glue works too. Whatever gets you going...
Double check those yellow locaters. You do not want to loose them or mess up the replacement.
Time for the other card (the IC-filled first one):
You can mount the holder closer to the front if you like. Make sure you don't get contact between the battery soldering ears and the chassis. I chose this location right of the voice cards to easily access it in the future to allow for easy replacement when this battery runs out.
Now, remount the right front panel. Take your time not to mess up any wires or press some components into odd angles. I remember some of it is a snug fit.
Before replacing the left front panel: Feel free to plug the SDS-7 into the wall again and test that you can edit a sound, save it and then unplug, wait a minute, replug and see if it's still there. If not, you should check the battery, your soldering and the rest.
Standard disclaimer: I'm a hobbyist myself and this was a story about how I did it. It's written nine months after the operation and solely based on images and memory. Not the fool-proof way to follow for the true morons out there. If you don't feel confident enough to look inside a vintage electronic instrument you should not bother with this exercise. If you wreck your SDS-7 or drop solder on your hands etc etc it's your own fault.
Buuuuuut... if you succeed the SDS-7 is a lot of fun and I can only gratulate you on owning a piece of cool vintage electronic instrument! :D
electronically yours, jesper
www.electronic-obsession.se